Work Orders
How to View Open Work Orders
Follow these steps to access your work order dashboard:
Navigate to Work Orders:
- Click on Maintenance in the left sidebar
- Select Work Orders from the menu
View current orders:
- All open work orders appear under the Current dashboard
- Review status, priority, and details at a glance

How to Create a Work Order
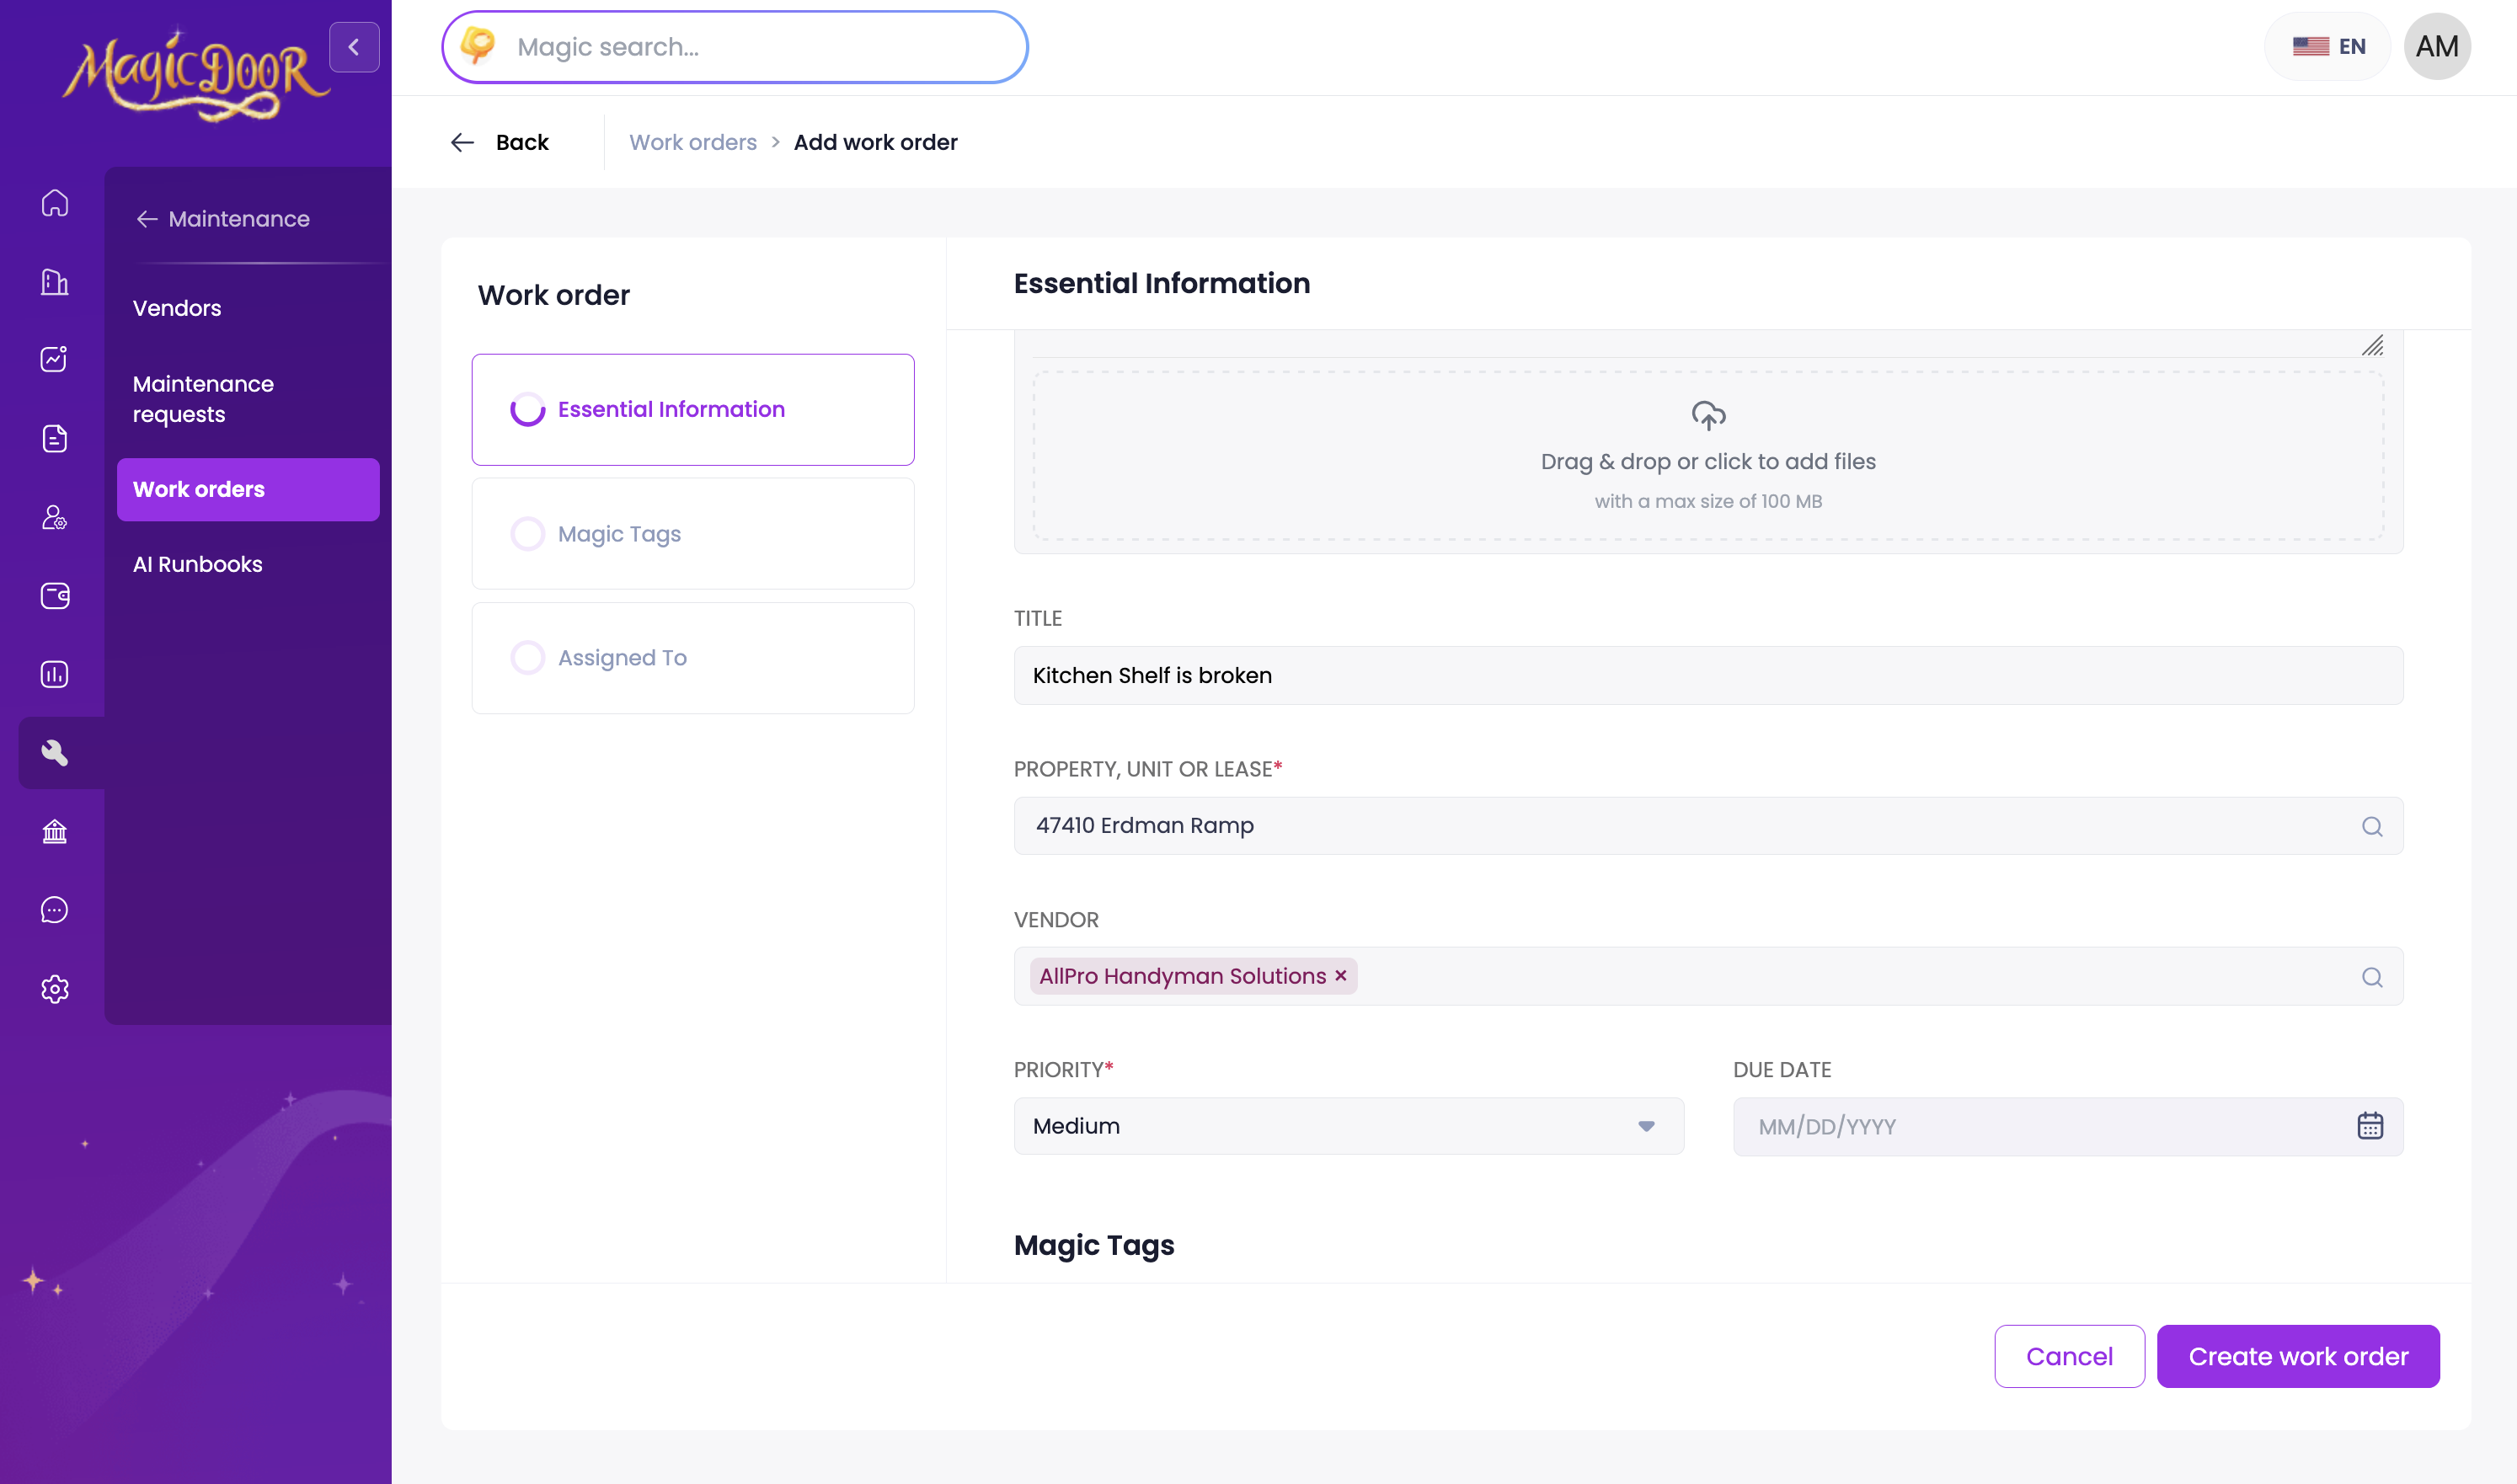
Follow these steps to create a new work order:
Access the creation form:
- Click on Maintenance in the left sidebar
- Select Work Orders from the menu
- Click the Add Work Order button

Submit the work order:
- Complete all required fields in the form
- Add any relevant details or attachments
- Review the information for accuracy
- Click Create Work Order to submit

How to Edit a Work Order
Follow these steps to modify an existing work order:
Navigate to the work order:
- Click on Maintenance in the left sidebar
- Select Work Orders from the menu
- Locate and click on the specific work order
Access the edit mode:
- Click on the Edit button at the top of the page

- Make your changes:
- Update the necessary fields in the work order form
- Review all modifications for accuracy
- Click Save to confirm your changes

How to Assign a Work Order to a Vendor
Follow these steps to assign a work order to a vendor:
Navigate to the work order:
- Click on Maintenance in the left sidebar
- Select Work Orders from the menu
- Locate and click on the specific work order
Assign the vendor:
- Find the Quick Actions section
- Click on Assign Vendor
- Select the appropriate vendor from the list

How to Delete a Work Order
Follow these steps to remove a work order from the system:
Navigate to the work order:
- Click on Maintenance in the left sidebar
- Select Work Orders from the menu
- Locate and click on the specific work order
Delete work order:
- Find the Quick Actions section
- Click on Delete
- Review the deletion warning
- Confirm to permanently remove the work order
How to Close a Work Order
Follow these steps to complete and close a work order:
Navigate to the work order:
- Click on Maintenance in the left sidebar
- Select Work Orders from the menu
- Locate and click on the specific work order
Close work order:
- Find the Quick Actions section
- Click on Close
- Add any final notes or documentation
- Confirm to close the work order
How to Link a Maintenance Request to a Work Order
Follow these steps to connect an existing maintenance request with a work order:
Navigate to the work order:
- Click on Maintenance in the left sidebar
- Select Work Orders from the menu
- Locate and click on the specific work order
Link the request:
- Find the Quick Actions section
- Click on Assign Maintenance Request
- Select the appropriate maintenance request
- Review the connection details
- Confirm to link the request and work order
How to View Work Order Communications
Follow these steps to access the communication history for a work order:
Navigate to the work order:
- Click on Maintenance in the left sidebar
- Select Work Orders from the menu
- Locate and click on the specific work order
Access communications:
- Select the Communication tab in the work order details
- View the complete history of messages and updates
- Track all interactions between property managers and vendors

How to Create a Bill for a Work Order
Follow these steps to generate and manage bills for your work orders:
Navigate to the work order:
- Click on Maintenance in the left sidebar
- Select Work Orders from the menu
- Locate and click on the specific work order
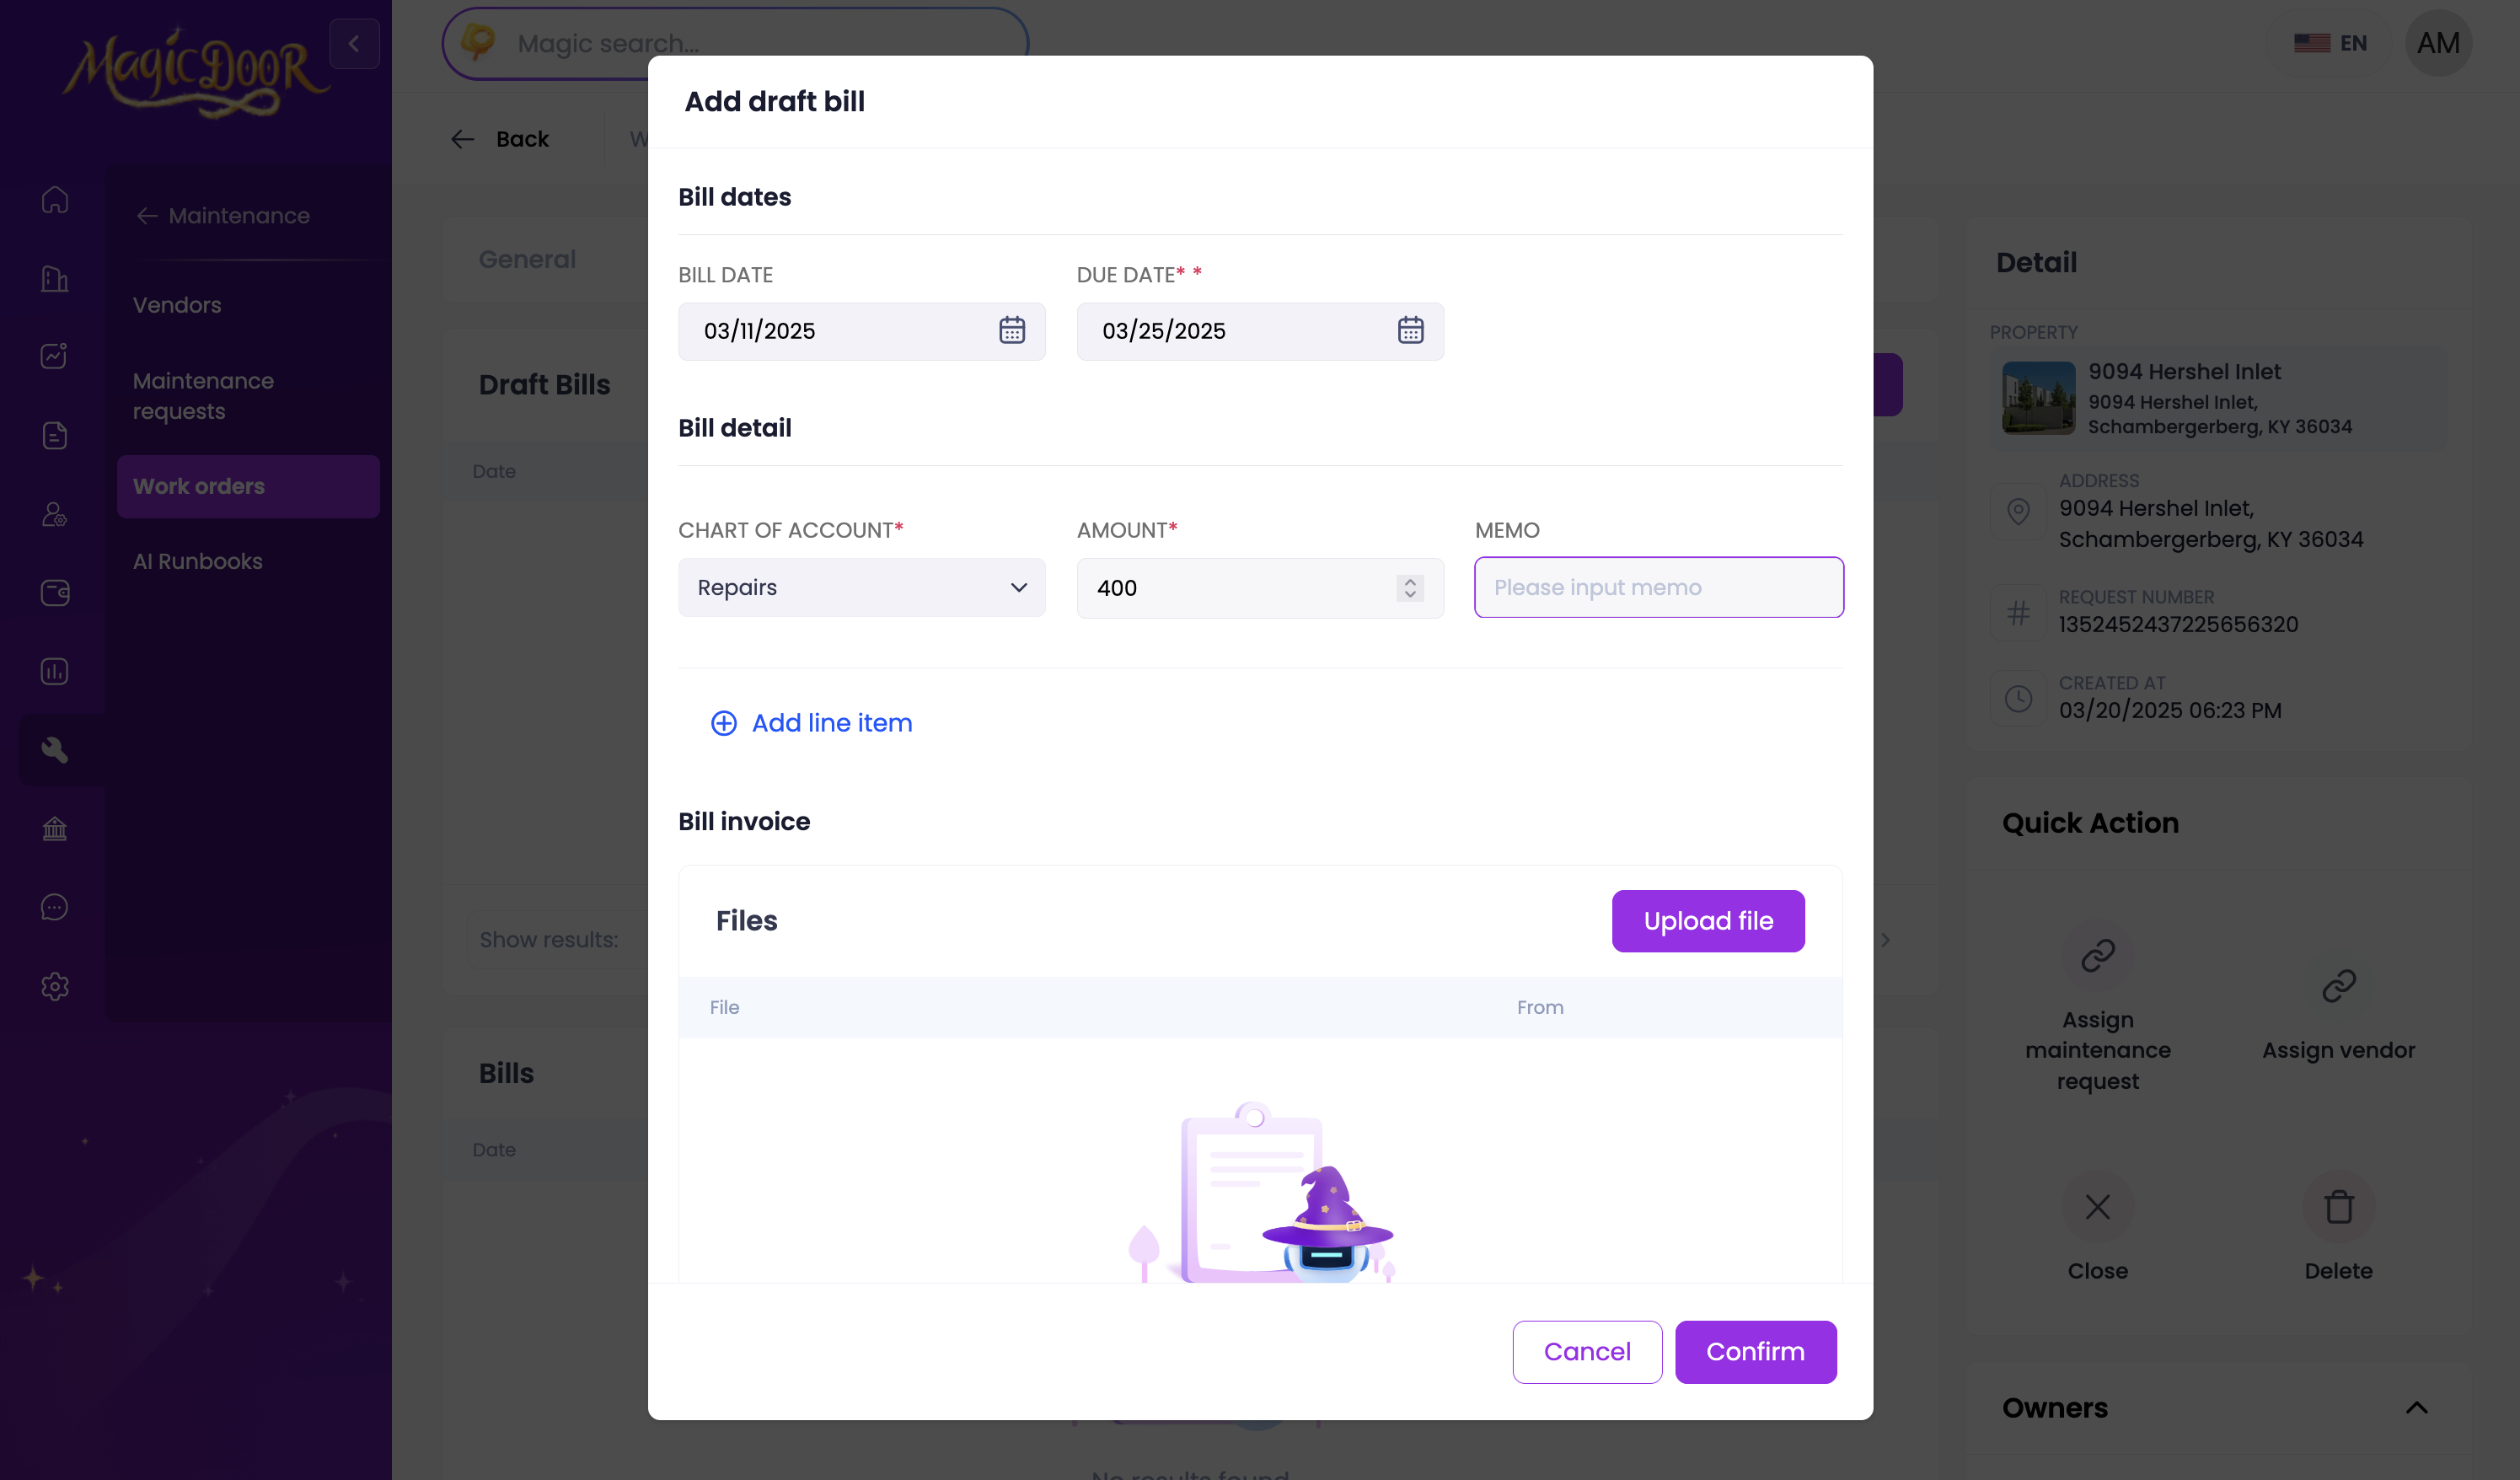
Create a draft bill:
- Select the Bills tab
- Click on Add Draft Bill

- Set up the bill:
- Complete all required fields in the form
- Review the information for accuracy
- Click Submit to create the draft

- Finalize the bill:
- When ready to process, locate the draft bill
- Click the Convert to Bill button
- Assign the bill to a vendor if needed

Note: Bills remain in draft status until assigned to a vendor. This allows for review and adjustments before final processing.